Forza TechArt

Lightmap Validator:
Overview:

A common problem that occurs during production of a track is that at one point or another, LOD0 of some objects will be tweaked and new LODs deriving from the edited mesh are not generated. This would cause issues that would only pop up later in QA - mainly that lightmaps baked on the base mesh would not map properly to the LODs generated from the prior base mesh. With thousands of individual objects per track, it’s not feasible to check each and every LOD level manually - therefore we needed an automated system of checking mass quantities of objects for any potential errors with their LODs or lightmap UV sets.
Solution:
A tool already existed to validate the UV set used for light maps on just the base mesh, so the easiest way to approach this was to extend the capability of that existing tool. I made sure the tool was associating the LOD levels with the correct base mesh, and rendering out a simple black and white map of the necessary UV set. Using Pilllow I composited the base mesh UV render over top of each individual LOD, and used Numpy to do some basic analysis of the resulting composited image. With a couple set cutoff thresholds I was able to flag many LODs that had not been regenerated from the new base mesh. The tool also allows for the user to select multiple flagged objects and automatically trigger LOD regeneration via 3ds max to cut down on time required to fix these issues.
Skid Texture Assigner:
Overview:

For each track there are hundreds of individual meshes that make up the surface of a racetrack that can be driven on. To make the track feel alive and used, drivable surface materials use a texture map to blend between the asphalt and a rubbered in “skid“ material. This used to be a manual process of assigning the appropriate mask texture to each piece of road, shoulder, curbing, etc; and on larger tracks this was incredibly prone to error. A simple mistake such as assigning the skid mask for road segment 24 to road segment 25 would create a clear error as the textures between the adjacent road segments would have a seam. This would usually only be caught far into production when the track was undergoing QA. The goal was to create a tool that was a 1 click solution to assigning these skid masks.
Solution:
This initially simple sounding problem ended up unearthing multiple underlying problems that 1: made the manual process even more prone to error, and 2: made creating a 1 click solution much more difficult. The major problem was a lack of naming convention for both meshes and materials. I had to create a multi- step process to break mesh and material names into usable “identifiers“ and then add additional logic on top of that to account for certain edge cases. Unfortunately this means the tool is only as good as the adherence to naming convention, so laying out an easily understood rule set for naming conventions was extremely important. The final tool could also account for loosely matched assignments where there may be more than one valid skid mask. This will be displayed in the final report and give the user the choice to manually select from only valid matches, which one is the correct one to use. The result is ~95% of skid masks being automatically assigned properly with the click of a button, and the remaining 5% either giving multiple choices to pick from, or highlighting where the problem in the naming convention of a mesh or material is so that an artist can fix it.
Naming Convention Matching Process:

Material names, model (mesh) names, and swatch (texture) names are split and processed for usable IDs according to specific rules for each file type.

The results are output in a easy to use GUI with dropdown menus for any actionable cases where multiple valid matches are found.

The resulting IDs are run through a 3 way matching process, with additional steps run if certain regex patterns are matched.
Content Validation:
Overview:
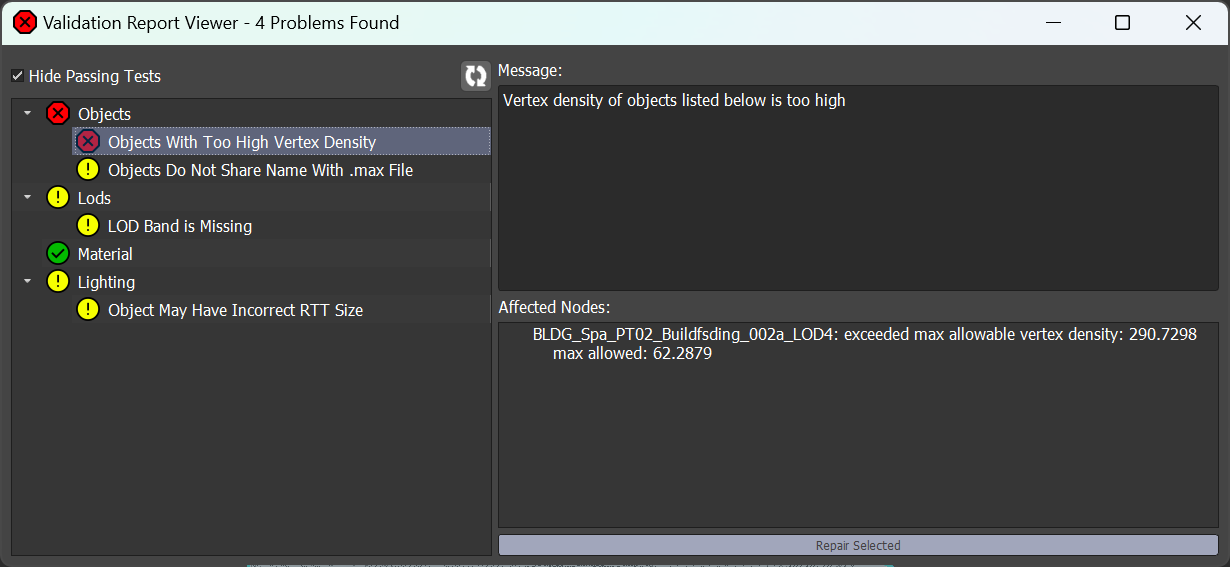
With the sheer number of assets that need to be created for each track, and the number of rules that need to be adhered to while creating these objects, it’s inevitable that mistakes will be made. If you’re lucky the mistake will be caught by the build process and throw back a useful error making it easy to track down. If you’re unlucky, no system will catch the error and it will end up in a track build to maybe be caught in QA. To minimize the number of content errors that even make it to the build system we created a content validation tool that can flag assets at save time if any problems are found. I had to account for many different possible errors while writing some of the validation tests such as incorrect naming (very relevant to the above Skid Mask Assigner), missing or incorrectly sized lightmap bakes, or missing LOD bands.
Vertex Density Validation:
While checking for missing LOD Bands or mismatched object: file names was easy, the more numbers oriented content validation tests were much more complicated. In particular the vertex density test required a significant amount of data gathering and analysis as we had not determined any best practices or guidelines about mesh density.
To write a simple, one size fits all, rule for vertex density I first needed to gather data to work from. I wrote a script that would write relevant data such as vertex count and object bounding box volume to a json database to work from. I ran this script and it took about a day to gather the data from thousands of individual 3ds max files per track. With this sizable dataset I started testing methods for calculating acceptable thresholds based on different parameters. The first approach of setting a threshold by object category (eg: barrier, building, tree, etc) ended up highlighting that our simple categorization of assets may not be specific enough. In the case of one track, the range of vertex densities was so wide that the data was unusable. A small, close to track , building was about the same size as a single quad of a large, faraway hotel building. This let me know that it would be more useful to categorize objects by physical size, rather than type to get usable results.
After re-categorizing objects into ranges of bounding box volumes I was able to find a clear relationship between the range of vertex densities in each volume set. The maximum vertex density tended to be 2-4x the category bounding box volume over the category average vertex density. Using this I wrote a simple test that could get an objects vertex count and bounding box volume, and compare that individual objects datapoints against a calculated acceptable maximum vertex density for the bounding box volume range that object fell within. Running the test immediately flagged some files where high poly count Quixel objects had been left in.
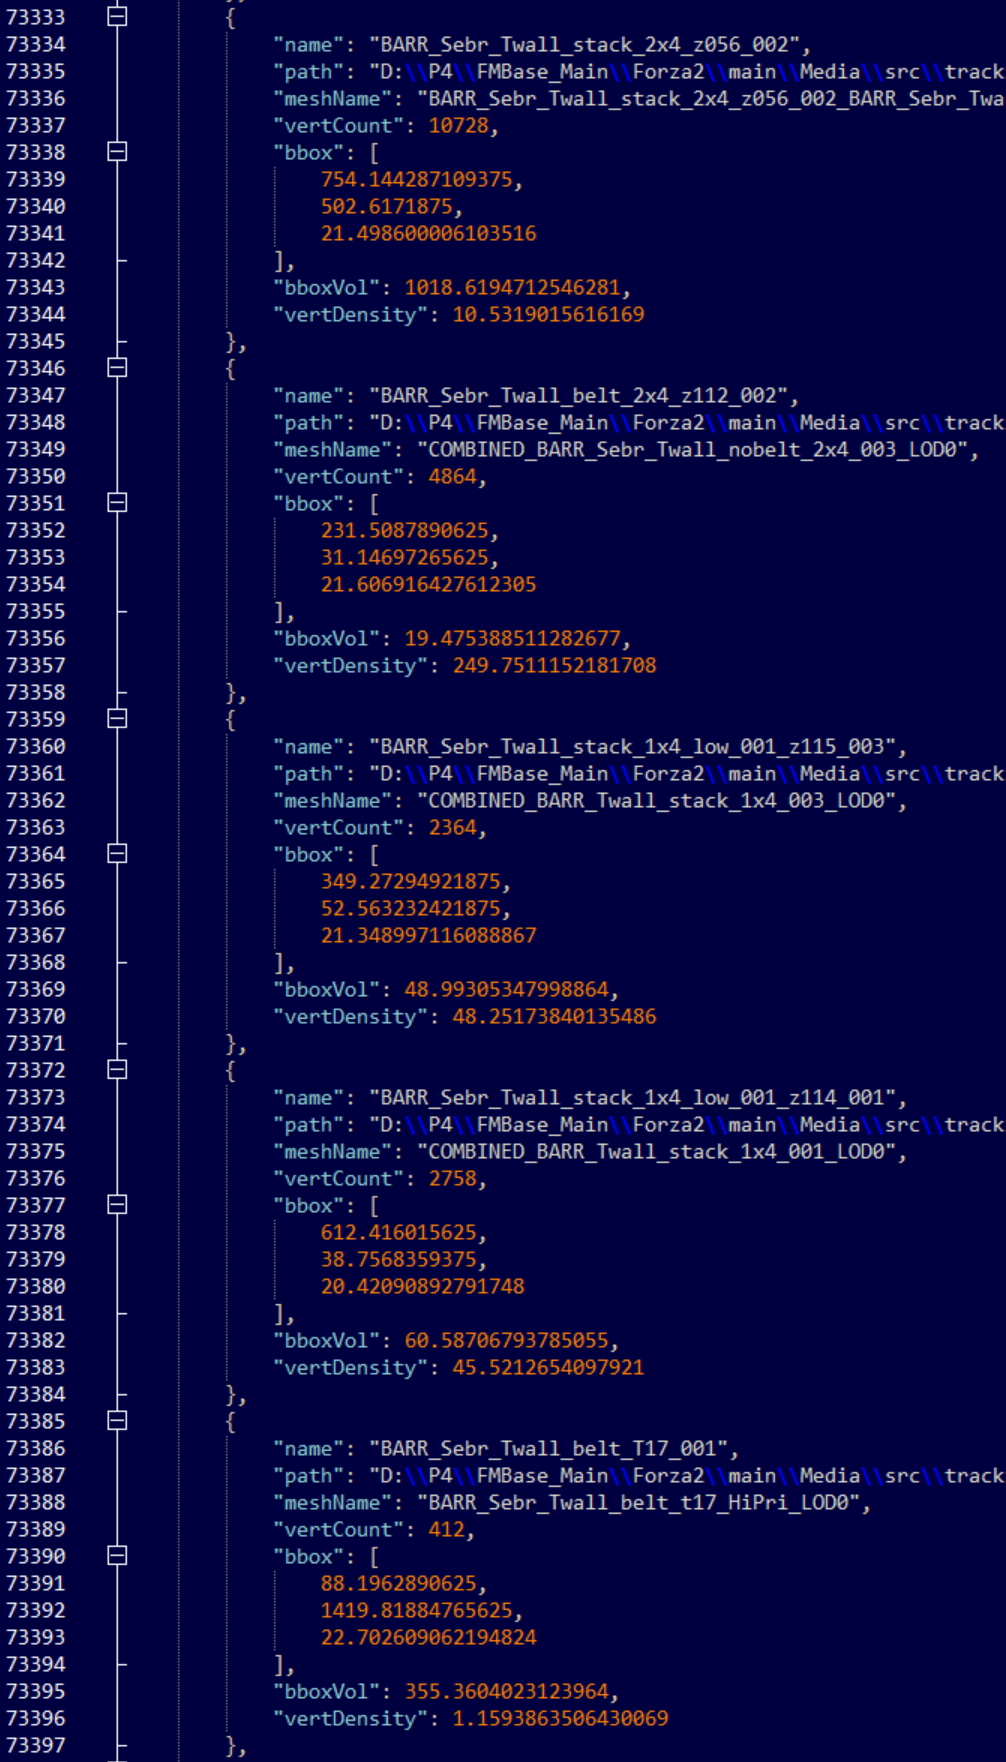
Example of the datapoints gathered on each object.
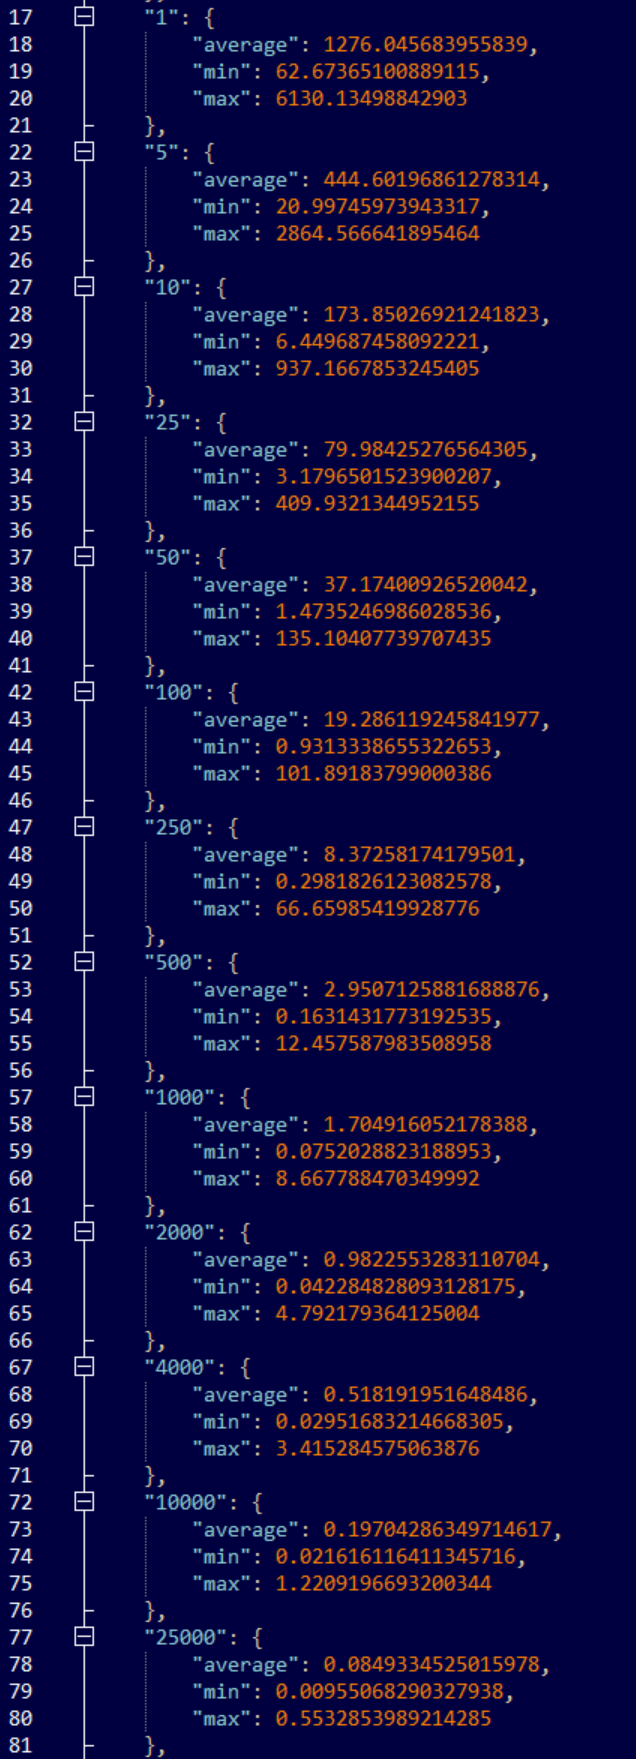
Some of the final cutoff thresholds for each bounding box volume used in content validation.
Cinematics - Batch Importer:
Overview:

While creating cinematics involving many cars, artists would have to add car recordings one by one to the timeline; selecting an animation and a car from a list each time, resulting in a somewhat tedious repetitive process. To address this inconvenience for cinematic artists I created a new interface that streamlines the content import process.
Solution:
I built upon the extendible framework we were already using for single item imports, to easily write new tools for any other kind of content that needs batch import functionality. For import objects that require multiple types of content to be selected for a single import; in the case of car recordings this is a car model and a car recording, asset category tabs show the relevant data types and can be multi-selected to create import items with that content preloaded into the dropdown selections.
To go along with this tool I also created a batch recording copier which makes the process of getting car recordings off of the devkit a one click solution as opposed to having to navigate to the car recording directory on disk every time.
Cinematics - Preset Manager:
Overview:
Cinematic artists also found themselves needing to manually input many parameters after creating new cameras and other cinematic objects. I created a preset manager interface for the cinematic 3ds max scene that allowed for saving and loading of object preset properties and sharing via syncing to a version controlled database or simply copy/ pasting in JSON formatted data.
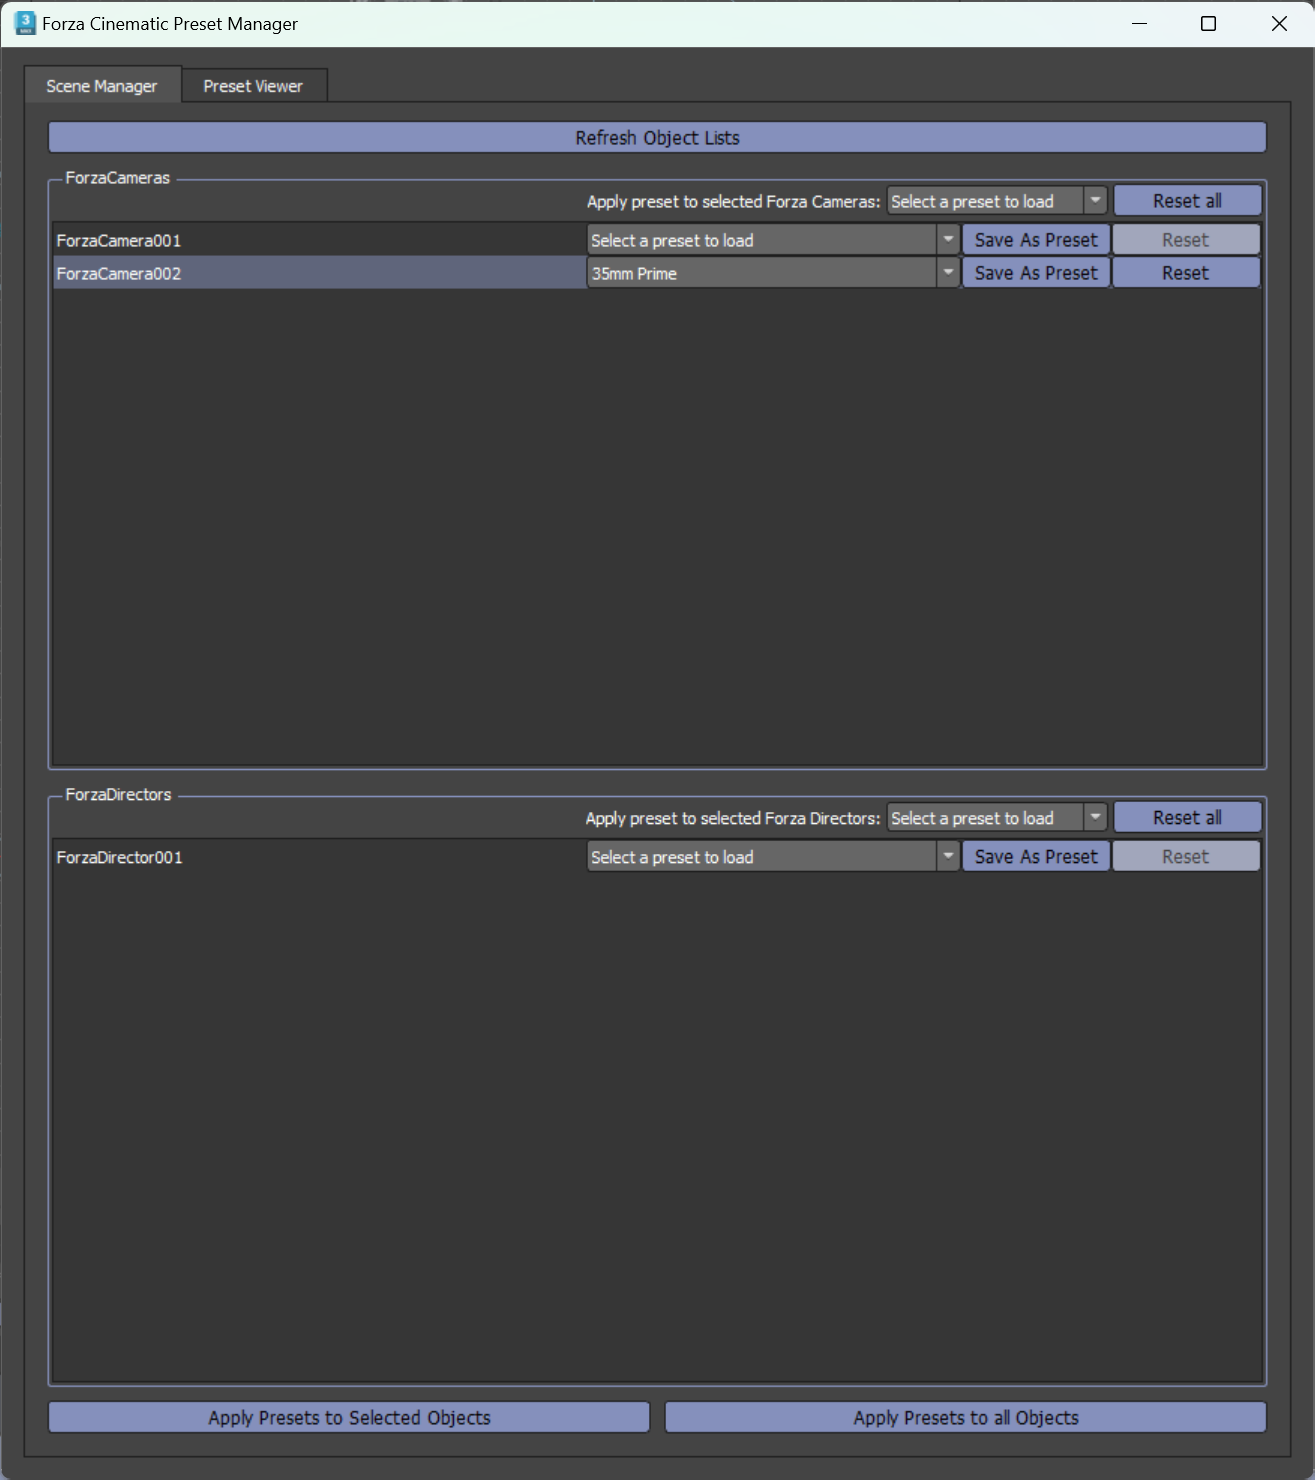
The interface tab for managing presets from the currently active objects in the scene.
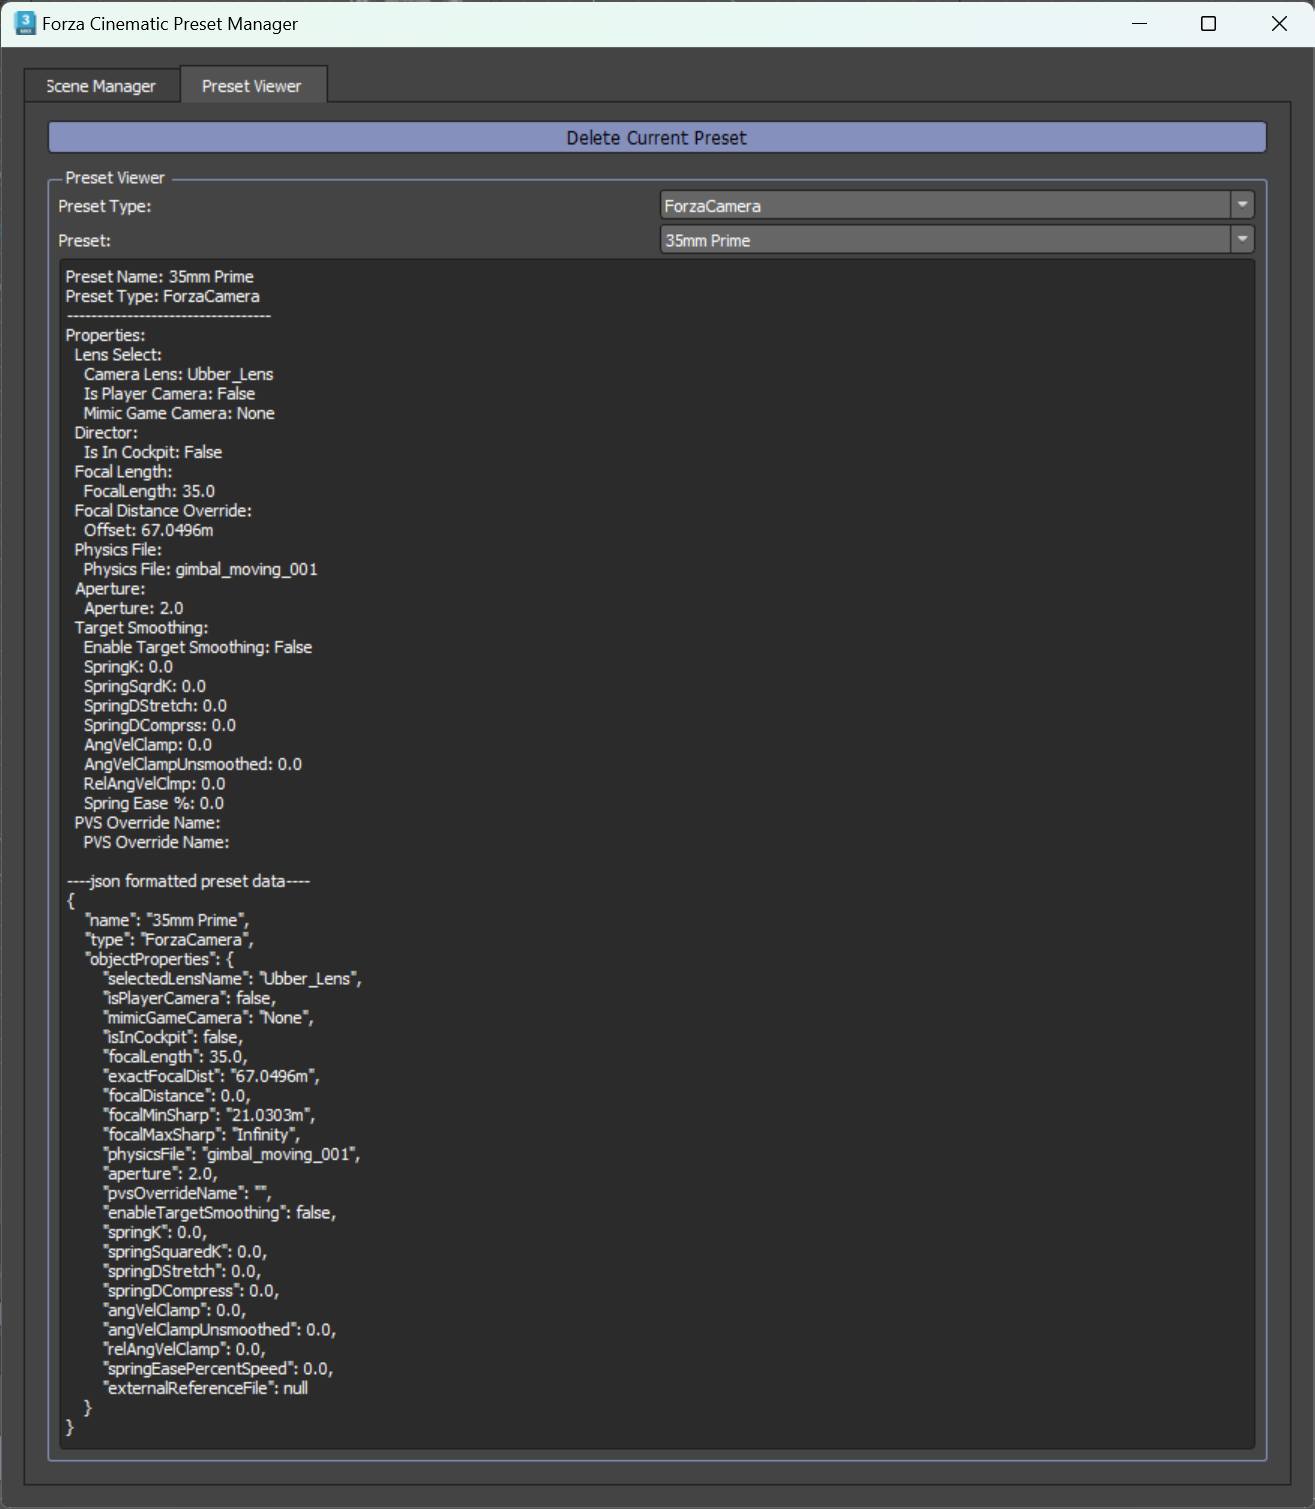
An inspector panel showing the contents of a selected preset, and giving access to the JSON formatted preset for quick sharing.
Mini-Projects
Among the larger projects discussed above, I was also responsible for addressing any bugs in preexisting tools and automating smaller tasks.
Content:
Automatic keyframe creation when adding a blend camera edit.
Cloud Configuration Scanner that displayed all cloud configs and the track files that reference them.
Extend allowable exposure values for cinematic cameras.
Update LOD Switcher to allow any arbitrary number of LODs.
Bug fixes:
Updated the cinematic to game interface to avoid crashing the game when restarting the cinematic interface.
Fix car frontal surface area calculation tool to work with 3ds max 2024.
Update terrain UV projection tool to account for non-square terrain segments.
Version Control:
Created a function to handle syncing large quantities of files at once in a script more manageable.
Added a function to estimate the disk space required and time of a requested sync job.